Saturday, August 20, 2011

5150 Star Army battle report

This report focuses on the simple patrol action of an Empire platoon sent to the planet to investigate possible rebel sightings. The stats etc that I am using were created by Ken Hafer and posted on the THW yahoo site and so I thought I would give them a try.

Time of day - Daytime

Weather – Fine

Investment level – Rebels 2, Empire 5

No aerial recon provided.

Intel – Good

Sergeant: Star rep 5, squad rep 5, specialist Dlt-19 rifle rep 4.

The 3 PEFs were generated and were reps 6, 4 and 6.

PEF set up

Turn 1 Empire 3 : Rebel 1

The first Storm troopers move on to the middle board section and immediately have LOS to the top PEF. This resolves to be a rebel squad all rep 4. The rest of the squad moves on to take cover behind the forest. The rebels take an insight test and pass 2d6. Their weapons have range of 48” (seems odd that the rebels weapons are exactly the same as the empire but have better range.) so all are in range, unfortunately for the stormtrooper he is the only valid target and is hit 4 times and is shot through the helmet and drops dead. The two troopers in range for the man down test duck back towards the wooded area in front, careful not to have LOS to PEF 3 as they don’t want to have to fight another possible unit yet.

1

The PEF rep 6 activates and moves towards the stormtroopers 16” and moves through the woods. This then resolves to be a unit in a defensive position. This causes an insight test for the stormtroopers which they pass 2d6 and open fire and due to their high reps, 6 rebels are hit even though they are in cover. 1 rebel is OD while the other 5 are OOF the remaining 2 rebels duck back out of the woods.

2

The second PEF moves towards the troopers through the woods in area 4. The rebel unit at the top of the table move intothe cover of the nearest woods and take up firing positions. (Patrols – do the move as either attack or defend then when contact roll on the patrol mission.)

Turn 2 E3 : R 6

As the rep 6 PEfs have been resolved, there is no rebel movement.

The stormtroopers move up through the woods and trigger insight tests from the 2 rebels near them and the rebels in the woods at the top of the table. Due to cover of the woods, the sergeant is missed and shoots back and misses. After a short fire-fight the rebels duck back further around the side of the woods out of LOS.

The rebels in the far woods open fire on the 2 visible troops and manage to hit 3 times (rolled 5 dice and 3 6s were rolled. One trooper is OD and the specialist is knocked down and is stunned. The troopers pass their received fire test 2d6 but they have no target to open fire on.

4

Turn 3 E6 : R3.

No empire movement.

The rebel unit nearest the storm troopers move in to the forest to take a shot at the troopers and trigger an insight test. The rebels lose 1 OD and the other is knocked down and the goes OOF. The PEF moves closer to the troopers while the remaining unit stays still and is ready to fire.

5


Turn 4 E2 : R3

The PEF moves close to the troopers and results in nothing there. The rebels have to targets so stay ready.

The troopers move further into the woods and the specialist spends the turn recovering. One lone trooper triggers an insight test as he is on the edge of the woods. The rebels snap fire and the trooper goes OD. The specialist recovers.

6

Turn 5 E3 : R3

Troopers move up to the edge of woods and with the resultant fire-fight end with the rebels leaving the field as they pass their cohesion test 0d6.

Victory to the Empire.

Thought on the game:  Considering I was using stats that Ken had made up, the only thing that I didn’t like was the stats for the basic rebel and empire guns.  All the guns on the rebel figures are pistol based and yet they had a 48” range, while the empire troops hold what appears to be carbine/ rifle type weapons and they have on a 24” range.  He has stated in the rules that these rules are based on the miniatures he had, so maybe he has different minis than I do.  Next time I play a Star Wars game I might modify the rebel range.

I like the 5150 rules and I am keen to give them a try in both 15mm and 28mm.  I have some Starship Troopers minis that I would love to play plus my 15mm rebel & earth force armies.

On to a different subject – I am waiting for some miniatures from Splintered Light so I can make up some 15mm armies for use in Rally Round the King.


Till next time.

Monday, July 25, 2011

Infinity +1

Well actually I have bought a Yu Jing Imperial army starter box and some Shaolin Monks for the Infinity game and the first things I have ready so far are a couple of vehicles in 28mm.  The first one is the Veloce Brio and the police car is the Interceptor both from World Works Games.  These will also make their way on to my THW version of a Super Hero game.  Now that I have a couple of different systems wanting terrain, this will help me focus on getting WWG scenery and working on the Super rules.

pic 1

pic 2

pic 3

pic 4

Saturday, July 16, 2011

Warrior Heroes dungeon bash

Here is a small report of a dungeon bash using Warrior Heroes - Armies and Adventures from THW. My comments etc of the game will follow the report. Apologies for the quality of the photos as they were taken on my iPhone.

The games I play of this will be centred around the character Reggie. He is a halfing thief that I played during my 3.0 D&D days. He started off a very average stat-wise thief, who ended up convincing an entire town (Brendon) that he was a paladin. He eventually became the mayor of Brendon and owned a large amount of land in the area.

He carried around his companion Pecky, a vulture that he thought was a parrot. He is my most favourite character in D&D and in the top 2 of all time characters (the other was a gruff professor in Call of Cthulhu). It must be said that the DM of the D&D games really contributed to the enjoyment of the character. Well done Scott J.

The following is the list of heroes that took part with the numbers in brackets are the increases in the stats that occurred at the end of the game.

Reggie the paladin: Rep 5(6), hardiness 1, hand weapon, sling, AC 3, with shield, social standing 4(5) thief cv 3

Vimak the warrior: Rep 4 (hardiness 1), hand Weapon, half plate ac 5, shield social standing 1 (2)cv 2

Thandon the cleric: Rep 4 (Hardiness 1), hand weapon, Ac3 with shield, caster SS: 4 cv 2

Aelthan the mage: Rep 5(6) (Hardiness 1), hand weapon, AC2, caster Ss 5 cv

Total cv = 9

Each corridor length will be 2 squares wide and each square will represent 5’. The bad guys for the dungeon bash were Gnolls and they used the beastmen list with the only modification was the removal of the terror note.

“Please sir, can you tell us of story of Sir Reginald the Brave!”. The old man looked around the tavern, straight in to the expectant eyes of everyone inside. He leant forward; stoked the fire with one hand then sat back and his rheumy eyes glazed over as he drifted off into deep thought.

Brother Thandon, gnolls have ambushed a wagon of the church’s, on its way to our fair city of Brendon and have stolen the holy symbol it was carrying. Can you and your group go find the lair of the gnolls and return our most sacred symbol. “It will be my honour and my duty,” replied Thandon.

As the party track the gnolls, Thandon fills them in on the details. Finding the lair was fairly easy as the trail of discarded equipment and bodies led straight to it. Reggie, one hand one his sword and with a glint in his eyes, took a deep breath and entered the darkness. After a short passage they came to a door and Sir Reggie called upon his God for aid. Deciding that Reggie needed to perform without aid, the request was denied and his companion was called upon to bash the door open.

1

Turn 1: As the heros go down steps they enter a passage 10’ by 10’ (double 1s rolled for length of passage) that had 1 door at the end of it. Reggie attempts to open the door (attempts to pick the lock) but fails completely (double 6s rolled). Therefore Vimak steps up to break down the door.
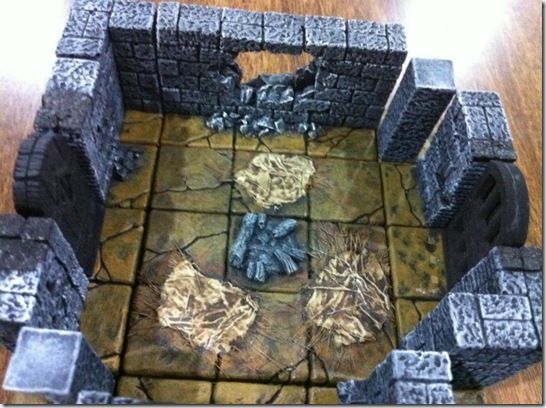
2

They entered the chamber wary of possible sentries, but the Sun God showed Reggie favour and the room was empty. Just as Vimak was about to enter, a stray beam of light glinted off the metallic head of a dart, that was hidden within the wall. With a raised hand from Reggie, Vimak, pauses long enough for Reggie to disarm the trap.

Turn 2&3: A 15’ x 15’ chamber is generated with no sentries (pass 0d6 for dungeon alertness table). There is however a level 4 trap in the doorway. Luckily it missed Vimak and before he moves through the door, Reggie stops him. He then attempts to disarm trap and after 2 turns manages to disarm the trap allowing everyone to enter the room.

3

Entering the room, they see that there are 3 possible exits and they hastily search the room. Finding nothing they turn to Reggie as to which door they should exit. Reggie clutches at the symbol on a chain around his neck at motions to the north door. He approaches it and with a hasty gesture to his god, he reaches for the door knob. With eyesight that rivalled his companion Pecky, who had been left back in Brendon, Reggie spotted another trap and with a quick pray, disarms it.

Turn 4: Reggie picks the lock of the north door after almost getting it (passed 1d6 then 2d6) and opens the door. In his eagerness with open the door, he just manages to spot a dart trap on the door and disarms it (Roll on the Beyond the door resulted in a special and this then resulted in a trap.)

9

With catlike grace and silence, Reggie moves down the corridor and bravely peeks around the corner.

Turn 5: As the door opens a 25’ corridor with a left hand turn is discovered and Reggie and group move up to the edge and peer around the corner and discover....

10

Using the cover of the shadows, Reggie makes his way down the corridor and with a quick side step; he manages to evade a spear trap. The rest of his companions move up behind him and they approach the door at the end of the corridor.

Turn 6: A corridor 50’ long ending, there may not be any guards in the dungeon yet but there is enough traps to guard. A level 5 spear trap narrowly misses Reggie as he leans up against the wall while looking around the corner. The group move up to the door and after looking for traps and discovering none, Reggie then sets about opening the door and with a click it opens.

12

Opening the door Reggie spies a group of gnolls and hyenas standing around their leader, Hunsma. He was a cleric of their foul God and in his hand Reggie could see the holy symbol of the Sun God. With a motion of his sword, both Vimak and Reggie charge in to the room with such ferocity that Hunsma left the room rather than face the holy wrath of the brave paladin and his companions. With the loss of their leader, the gnolls are easily overcome.

Turn 7: Opening the door reveals a 20’ by 20’ chamber occupied by the following – 2 hyenas, 1 missile armed gnoll, 1 sword/shield armed warrior, 1 witch and the big-bad.

13

Rolling on the test of wills table with the heroes winning the test by 1 success thus resulting in the heroes testing the charge. Reggie charges a hyena, Vimak charges the shaman and hyena, Thandon attack the hyena and Aelthan prepares to cast a magic missile at the bigbad.

Activation roll H5: B2

Reggie acts first and attacks the hyena - pushes it back 1 square, kills the hyena and advances on to the missile armed gnoll.

Vimak attacks the witch also pushing it back 1 square and then driving his sword through the throat of the witch and killing her. Thandon attacks the hyena but after a brief to and fro is unable to best it and will continue. Aelthan casts his missile at the BB but fails to damage him.

Badguys - I need to roll on the NPC action tables and for the bigbad I rolled 6,6 even though he is rep 6, I took this as pass 0d6 and so he retired out the door he was standing next to. The others are all in melee so the results were the missile armed gnoll goes down allowing Reggie to move next to the melee gnoll now outnumbering the gnoll. Luckily for the gnoll, he manages to get his shield in the road and thus causes a standstill. While Thandon kills the hyena.

(After the battle I worked out that I roll for activation after the first round of combat).

Turn 8: h3: B6

Unfortunately for the gnoll he doesn’t activate this turn and then Reggie runs it though with his sword. With the last gnoll killed, a quick search of the chamber produces no items of interest (even with a plus 2 on the booty and loot table).

17

Finding nothing of interest, they leave the fallen corpses behind them and move deeper in to the lair. Communing with his God provides Reggie with the information needed to make new combat plans. Behind the door is a natural cavern that some inhabitant from the distant past had further excavated but now ended in a dead-end due to the collapse of the tunnel. Unfortunately for Hunsma, this meant that he had now where else to run. Aelthan starts to speak words of magic and with exquisite timing, Reggie throws open the door, just as a fiery blast emanates from Aelthan and lands at the feet of Hunsma. When the smoke cleared, Hunsma and his followers were dead except for a hyena who slipped in to a crack in the wall and was not seen again. Reggie moved towards the corpses and gingerly picked up the symbol from the ground and gave it to Thandon. With a quick pray to the Sun God, they relieve the dead of their possessions and return to Brendon heroes.

Turn 9 A 35’ corridor lead to a door, there were no traps and when the door was opened, it which had 1 exit which then ended in a dead-end (I set the last section up as I had generated the bigbad again as part of the occupants of the room, based on his actions from the 1st encounter). As it turned out to be a short corridor and dead-end, I decided that this would be the last encounter.

As both groups had the same number of successes on the test of wills table, neither side did anything and we go straight to combat.

H2:B4

The magister gnoll casts a missile spell at Aelthan but is unable to hit.

The greater gnoll and 1 hyena attempt to charge but roll fewer successes so stand still. The other hyenas stand and snarl.

Thandon (rep 5) goes first and successfully casts a blast spell and all baddies are in blast radius. The effects of the spell are devastating as the bigbad goes down OD while all but 1 hyena go OOF. The remaining hyena pass its leader lost test 0d6 and routs from the battle. Looting the room finds the holy symbol for Thandon while a considerable amount of treasure has been found allowing 1 additional social advancement roll as they return to Brendon successfully.

My thoughts on the game.  I believe that this was one of the earliest games and it shows.  I found that it seemed ‘chunkier’ than the other THW games I have played.  Rolling on the Test of Wills table was confusing (not sure if I had missed something during my reading of the rules) and then rolling on the wanting to charge table added to my confusion.  It didn’t seem to flow for me.

Magic can seem over powered as in the case of the blast spell, if looked at the one successful use of it.  You need to remember that the couple of other spells that were tried to cast never worked as it uses the same type of table as the melee table.  You need to roll a number of dice equal to the rep of the caster counting 1-3 as successes and compare them to either the level of the spell or rep of the target.  You need more successes than spell/target to cast successfully and if you fail to get any successes you loss a point of rep when casting spells which then in turn makes casting spells harder for the remainder of the game.

I still enjoyed the game but may tweak the combat side of things to be more in line with other, newer THW systems.

Saturday, June 18, 2011

Recon mission NUTS! style

Yesterday I played my second game of NUTS! from THW and here is the following battle report.  I stepped up the complexity of the game a notch and this game was going to include vehicles.  I have made a slight change to the vehicles rules for simplicity, normally each vehicle has a number of crew and each crew can have a different Rep, so I have kept the number of crew but have just given them all the same Rep. 

The tactics of the Russians change part way through the game as my kids were initially playing and then left so the Russians were then played by the system.  Note to self though, next time the kids want to play, don’t make a report out of it to dramatically speed up play.

The table was set up as seen in the below picture.

table setup

The mission was going to be a squad of German Fallschirmjagers landing by glider, meeting up the remains of a Panzer 4 platoon (random number rolled)and performing recon on the table edge with the hills and fighting various Russian forces.  I have used my coloured counters underneath the infantry to indicate the Rep of the figure and I have found that this really helped as I new just by looking at the miniature what it’s Rep was.  Blue indicates 5, no counter represents 4 and green indicates 3.

The FJ setup around the glider, 1 Pzr 4 (Rep 3) had joined the battle and entered along the road on the same edge as the FJs and the 3 PEF (possible enemy forces) locations and their Reps are indicated by dice.

German FJ setup

PEF setup

Before the first turn, the FJs had LOS to the vineyard, orchard, PEF 3 and the second hill and as per the mission rules, I needed to determine what each terrain piece had and as a result a SU76 appeared in the vineyard (Rep 5) and at PEF 3’s location (Rep 3). Both the Panzer 4 and SU76 on road were assumed to have moved on to the board.  This was necessary as vehicles in NUTS!, if they don’t activate keep moving in the same direction and speed instead of not moving (like the infantry).  The vineyard was treated as a woods (I did get the rules for wrong for the first few turns though, as you need to be on the edge of the wood to see out of).  Hill 2 needed to be scouted again next turn.

SU76 setup

Turn 1.  G- 5  R-4

As both German squads were led by Rep 5 leaders (the NCO and Jnr NCO) both could activate.  Both squads fast moved to get into the vineyard and squad 2 readied grenades to throw at the SU76 inside the vineyard.  Unfortunately the Jnr NCO fumbled his throw (I rolled double 6) and in his haste managed to drop the grenade at his feet.  With a quick and rather nervous yell, the squad members (all within 2.5” radius of Jnr) dove for cover and as luck would have it only two squad members were stunned.  While this happened the Panzer 4 moved along the road.

The  SU76 decided that as it was loaded anti-tank rounds, it would move out of the vineyard to take up a position in the village to shoot at the Panzer but again the Gods of War were cruel and it managed to get stuck and could not move.  As it wasn’t loaded with HE it chose not to shoot at the German infantry (when you shoot or change ammunition, you need to reload and Declan didn’t trust his dice rolls, having just rolled the second double 6 of the game).  While PEF 2 moved towards PEF 1 in the village.

turn 1 grenade

Turn 2.  G 6, R 5

Again the Panzer moved down the road (I had randomly determined its speed at the beginning and it so it moved another 6”).

The SU76 on the road makes an insight test, passes 2D6 and shoots at the Panzer but misses and is unable to reload as it passed 0D6 on the reload test.  The Panzer returns fire and misses also but manages to reload.  As the SU76 (road) cannot return fire, the SU 76 (vineyard) moves out and behind the house nearest to it.  This then causes an insight test for the Panzer which then shoots and disables it.  It only passes its reload test 1D6 so can only fire when it is next active.

Turn 2

Turn 3   G4, R 2

Squad 2 stays still to allow the stunned members of its squad recover while squad 1 moves further into the vineyard and had LOS to PEF 1 (this shouldn’t have happened as the squad weren’t on the edge yet).  This resulted in a rest of platoon result and as no infantry were placed yet I decided that the rest of the SU&6 platoon would be placed.  Using Flames of War as I guide to unit size (maybe not historically accurate, but I am after a fun game not a history lesson Open-mouthed smile) I randomised the unit size and this resulted in 1 more SU76 being placed facing in a random direction.  This resulted in it having its back to squad 1.  As it was opened top and 3 crew were visible, the NCO ordered for the squad to shoot (not throw grenades).  I wasn’t sure if crew had any weapons on them so for this game I rolled for them and they didn’t have any.  As a result of the shooting, the TC, gunner had ducked back and the loader had had enough and decided to bail out and run and hide inside the building.

The Panzer moves along the road and fires at this new 76.  I wasn’t sure if a tank could move and turn its turret or could only turn it if it was stationary, so decided it could but gave the 76 a cover modifier and then resulted in a miss, but did reload.  As the gunner of the 76 had ducked back, no fire was returned.

At this point , Declan had left and Connor was still playing and so with the threat of the infantry behind it and the panzer to its front, the 76 decided to move through the village and move to gain cover from a building.  It then proceeded to fire at the Panzer, missed and could not load as the loader had bailed out.  Now Connor left so the last SU76 rolled on the NP Tank movement table and passed 1D6 so moved towards the other SU76 behind the building.

Turn 3 a

Turn 3b

Turn 3c

Because of not using my woods rules correctly, and rolling to scout hill 2 (needed to re-scouted when either LOS of moved on) and a squad of Russian infantry moved on the hill.

Turn 4d

Turn 4   G2, R6

No Russian infantry could move and the tanks had to move if they moved the turn before.  As a result, the SU76 that had not stopped to fire had to move in the same direction and speed.  This placed it on the road facing the direction of the table edge so had obviously decided that it was leaving the battle.

The German squads rearranged and the new squad 1 fast moved (passed 2D6) in to the village and resolving PEF 2 discovered that there was nothing there.  Squad 2 moved to the edge of the vineyard (remembered my woods rule now Open-mouthed smile) and hastily set up the 2 LMGs.  One would be able to fire this activtion and the other would only be able to fire as a reaction.  The squad then fired at the Russian infantry and at the end of the fire fight the Russian Jnr NCO, LMG Gunner are OOF with the Loader now picking up.  The Russians being outgunned by the LMG duck back behind the hill bringing their wounded with them.  The Panzer then  shoots at the SU76, misses and reloads.

Turn 4a

Turn 4b

Turn 4c

Turn 5 G5, R4

Squad 1 moves on to hill 1 and scouts it out and discovers that there is nothing there.  From here they are able to shoot at the 2 rep 5 troops in the above photo.  As a result, 1 trooper goes down and the other ducks back dragging the casualty with him.  The panzer does nothing.

The SU76 moves of the board as it had to move in the same direction and speed as it did not activate.  While the other stays where it is.

Turn 5a

Turn 5b

Turn 6   G4/2  R4/3

After rerolling activation dice because of doubles, the remaining SU76 reverses as far as it can so as to try and link up with the infantry and finally manages to reload.  The infantry stay behind the hill.

Squad 1 moves over the hill and prepares to scout out the table edge.  Squad 2 remains where they are while the Panzer moves up to the corner of the building.

Turn 6a

Turn 7  G5, R2

Squad 1 remains stationary and scout out the table edge.  Squad 2 again remains stationary while the Panzer reverses so it can fire at the SU76, thinking that they have a side shot but discover that it is still actually in the front.  Again they miss but do reload.  The driver now manages to pass his received fire test 0D6 so the 76 retires behind the hill.

Now that the Russians can activate, the drive fails to rally and drives further around the hill and the infantry now join up with the tank.

Turn 7a

Turn 7b

Turn 8  G6, R1

No German movement.

The SU76 driver now rallies and so it move over the hill with the infantry behind it, with 1 infantryman left behind to look after the wounded.

Turn 8a

Turn 9  G3,  R5

There is no Russian movement (As I am typing this I realised that the tank should have moved even though it couldn’t activate)

Squad 1 fast moves back (passes 2d6) having now completed their objective while the Panzer finally manages to destroy the SU76 and as a result, the infantry then duck back behind the hill.

Turn 9

Turn 10 G1, R2

Rolling for the Russian infantry sees them stay behind the hill, obviously deciding that there is nothing they can do to stop the German FJs so why put themselves in a position for possible trouble.

Germans all fast move back towards their table edge.

Turn 10

Turn 11  G1, R5

No Russian movement.

Germans move off table.


Well it took most of yesterday to play the game but considering I was still learning rules, writing the batrep as well as for a period of time deal with 3 excited children (until they started dying then it wasn’t so fun.  But you can’t expect them to stay focused for long when you have a 9, 7,& 6 yr old playing with you.)

Very enjoyable game and just thought I would include a final shot of my table.  I was rather cramped for room as I needed to have my books open plus note book and then I remembered one of the reasons why I bought this particular table – The pull out shelves.

table

Thursday, June 9, 2011

FOW Russians

Here are the latest pictures of my painted FOW Russians.  This comes in at about 1800pts.  I still have 5 bases of sappers, a MG company and a Scout platoon yet to paint.  I have some flame thrower infantry as well but some of these are going to be individually based up for NUTS! so I might not have enough for FOW.  Anyway enough chit chat, on to the photos.

russian as at 8 June 

Here you can see a 2 platoon Strelkovy Company, a 3 platoon Strelkovy Company, Gods of War Artillery Company ( 8 76mm ZIS-3 and 4 122mm howitzers), 6 SU 76s 2 early and 4 later models, KV2 (I think), AA platoon, 5 T 34/76, 6 valantines (4 VIII and 2 II)

infantry company 1

infantry company 2

Gods of War Artillery

artillery 2

artillery staff

tanks

AA MG

These bases are different as I played with different types.  This looked more in line with Normandy etc so I will use it for my US and German armies.

valantines 1

valantines 2

Well that’s it for now.  Enjoy.